
This trip report is part 2 of 3 that documents my hike of the final two sections of the Sierra High Route. This post covers the “Canyon Country,” as Steve Roper, the author of the Sierra High Route guide book, calls it. The first post, i.e., the start of this particular hike (but not the high route) covers the Headwaters Country while the third post in this series details my return journey from the northern end of the route to my car. Use the links below to read about other sections of the Sierra High Route!
Trip Planning
Specs: 34.1 mi | +11,700′ / – 9,200′ | 2 days, 2 nights
Difficulty: Mostly class 1 with a few class 2/3 problems [learn more]
Location: Inyo National Forest and Yosemite National Park | Home of the Me-Wuk, Western Mono/Monache, and Northern Paiute peoples | View on Map
Route: The Canyon Country section of the Sierra High Route begins at Tuolumne Meadows. Rather than repeat Roper’s guidance for trailheads and parking locations, I’ll just direct you to his guidebook (see the resources section below). From Tuolumne Meadows, follow the Sierra High Route north to Horse Creek Pass. Because I planned to hike back to my car in Mammoth Lakes, I did not descend to Twin Lakes. If you park a car at Mono Village or otherwise arrange for transportation, you can complete a few more cross-country miles past the pass to reach Mono Village.
Permits and Regulations: A wilderness permit is required for all overnight travel in Yosemite National Park and Inyo National Forest. Since my entry trailhead is located in the National Forest, I applied for a permit through the forest service at Recreation.gov. If you instead begin at Tuolumne Meadows, you’ll need to get a permit from Yosemite. Note that bear canisters are required for most of this hike. Finally, remember to leave no trace; it is your responsibility to preserve the wilderness for others to enjoy!
Resources: Steve Roper’s book, The Sierra High Route, is a crucial resource to navigate the off-trail portions of this route. I augmented his instructions with the National Geographic topo map for the Yosemite area. The scale on this map makes navigation difficult, however, so you might find my interactive map of the Sierra High Route more useful for your own purposes. Hosted on CalTopo, this map can be exported at any scale to a PDF and printed!
Tuolumne Meadows to Shell Lake
5 July, 2020 | 9.7 mi | +2615 / -1400 ft | View on Map
It’s only 11 AM but it’s already hot out here. I follow a small use trail from the Tuolumne Meadows Ranger Station toward the John Muir Trail, trying to stay in the shade as much as possible. I’m not very successful; there just aren’t many trees. I soon reach a bridge over one of the many Tuolumne River tributaries and stop to chat with three other backpackers that are lounging in the shade. It turns out they’re also hiking the Sierra High Route! One of them says, “So you must be Andrew, then.” I’m a bit taken aback; how do they know my name? They laugh at the bewildered look on my face and explain that they’ve been just behind me for days and saw my name in the Blue Lake Pass register. It’s funny how close you can be to another group in the wilderness and never know they are there!
After a brief chat, I say goodbye to the Bay area gents and hike on. Just beyond the bridge I turn onto a trail that leads to the Gaylor Lakes. Right away, the path gains a few hundred feet, reminding me that my pack is significantly heavier after resupplying this morning. Hiking with a heavy pack is kind of like running, though; you quickly fall into a rhythm and soon the pack just feels… normal.
About a mile down this gently ascending trail I cross the Dana Fork of the Tuolumne River. There are lots of rocks to hop on and the water is shallow, so I do my best to cross without getting my feet wet. I’m nearly successful, but one of the rocks is loose and my foot and shoe slip into the water. Oh well – wet feet dry pretty quickly out here.
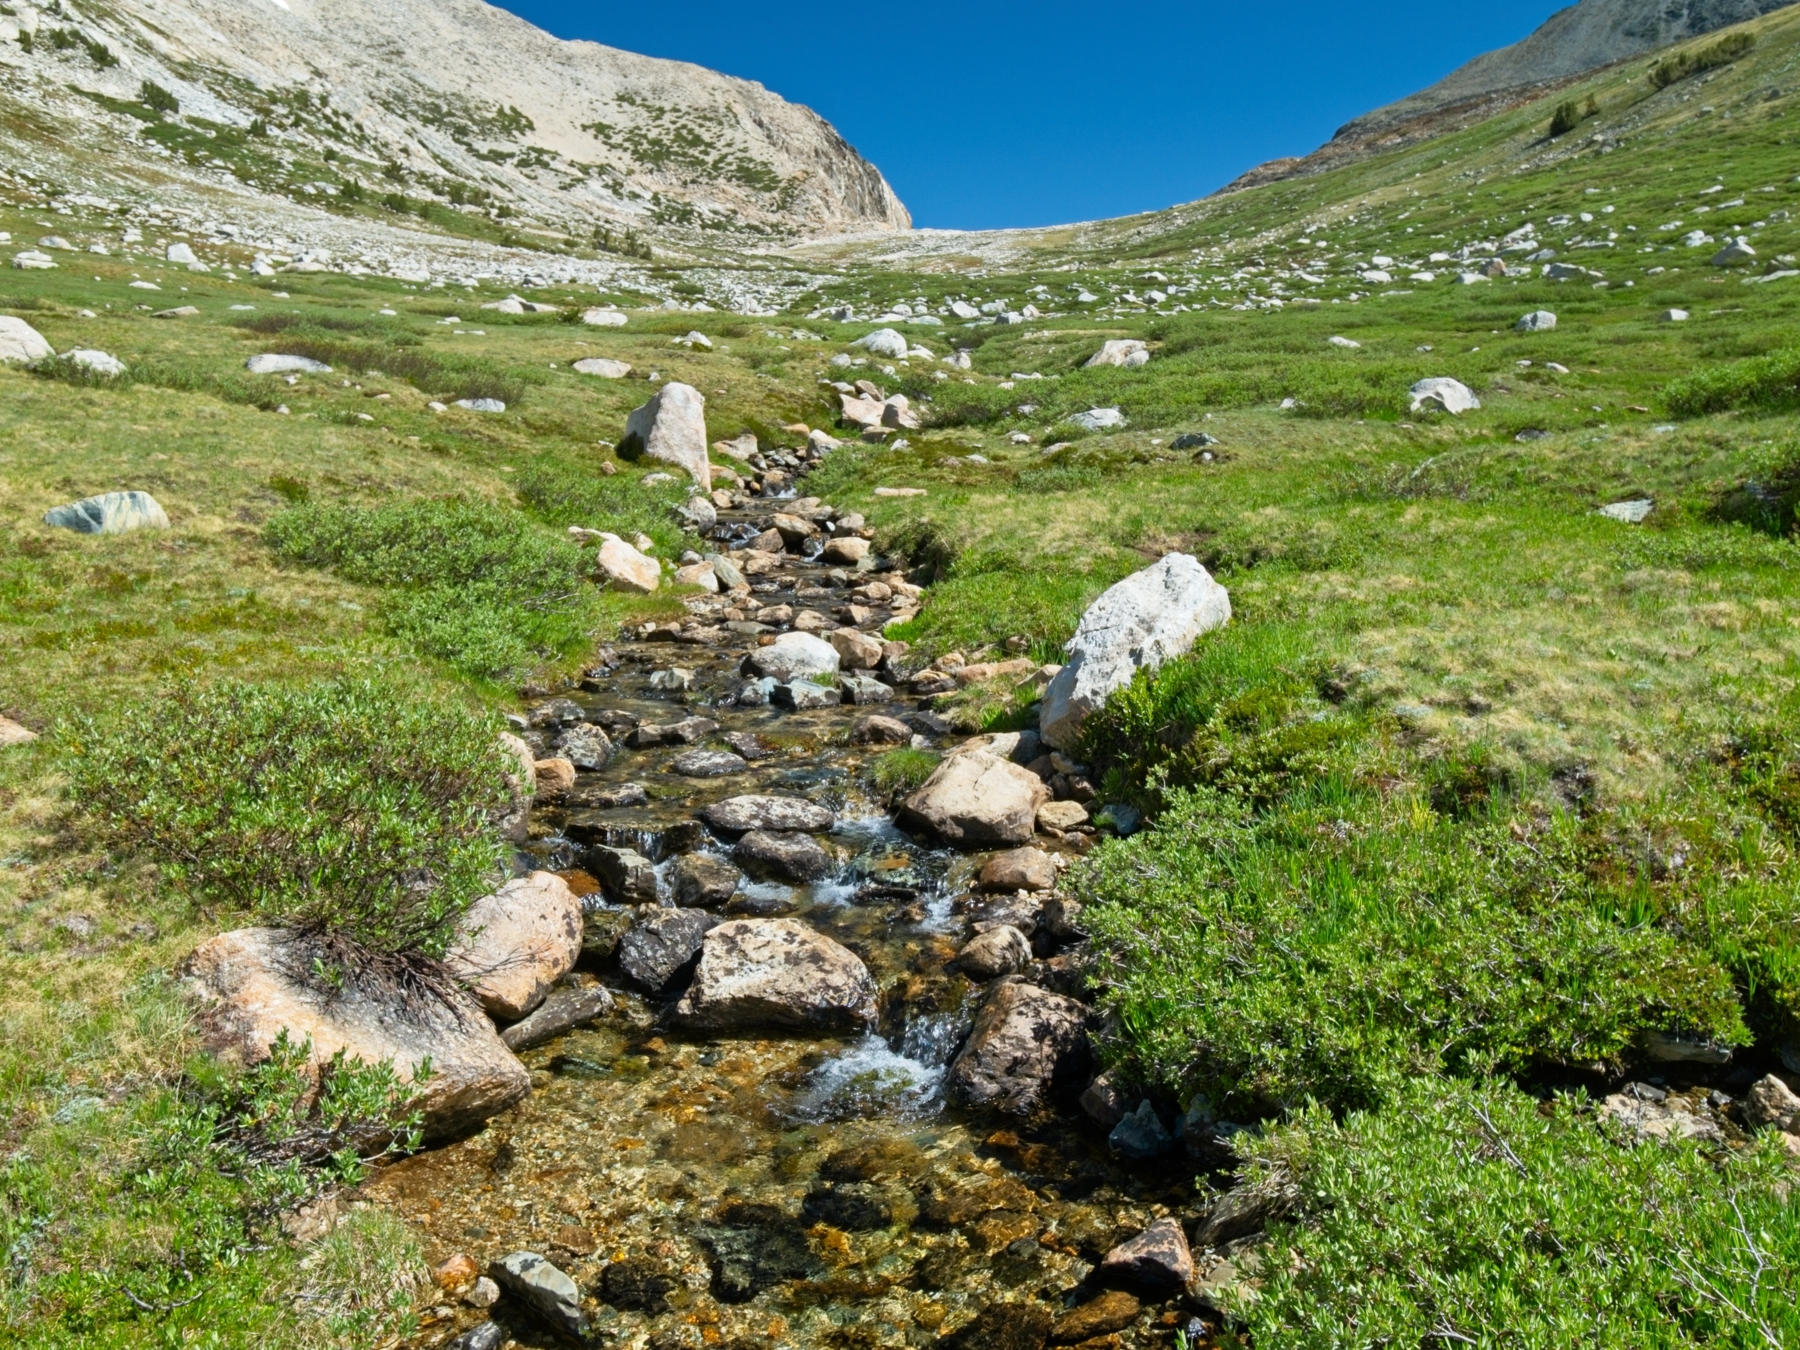
Just past the Dana Fork, I cross the Tioga Road, looking carefully for cars. Roper warns that the trail on the opposite side of the road is difficult to find, but the path is very clear; perhaps it has been improved since the last update to the Sierra High Route guidebook. I follow this trail up into the hills, leaving the sounds of speeding campervans behind. At first, the path seems to be part of an old road, with sections of crumbling asphalt poking through the grass here and there. The trail soon narrows to a single-track route through the woods, following a creek that tumbles through a rocky ravine. I enjoy the walk. I have shade, at least, and the woods are still and peaceful.
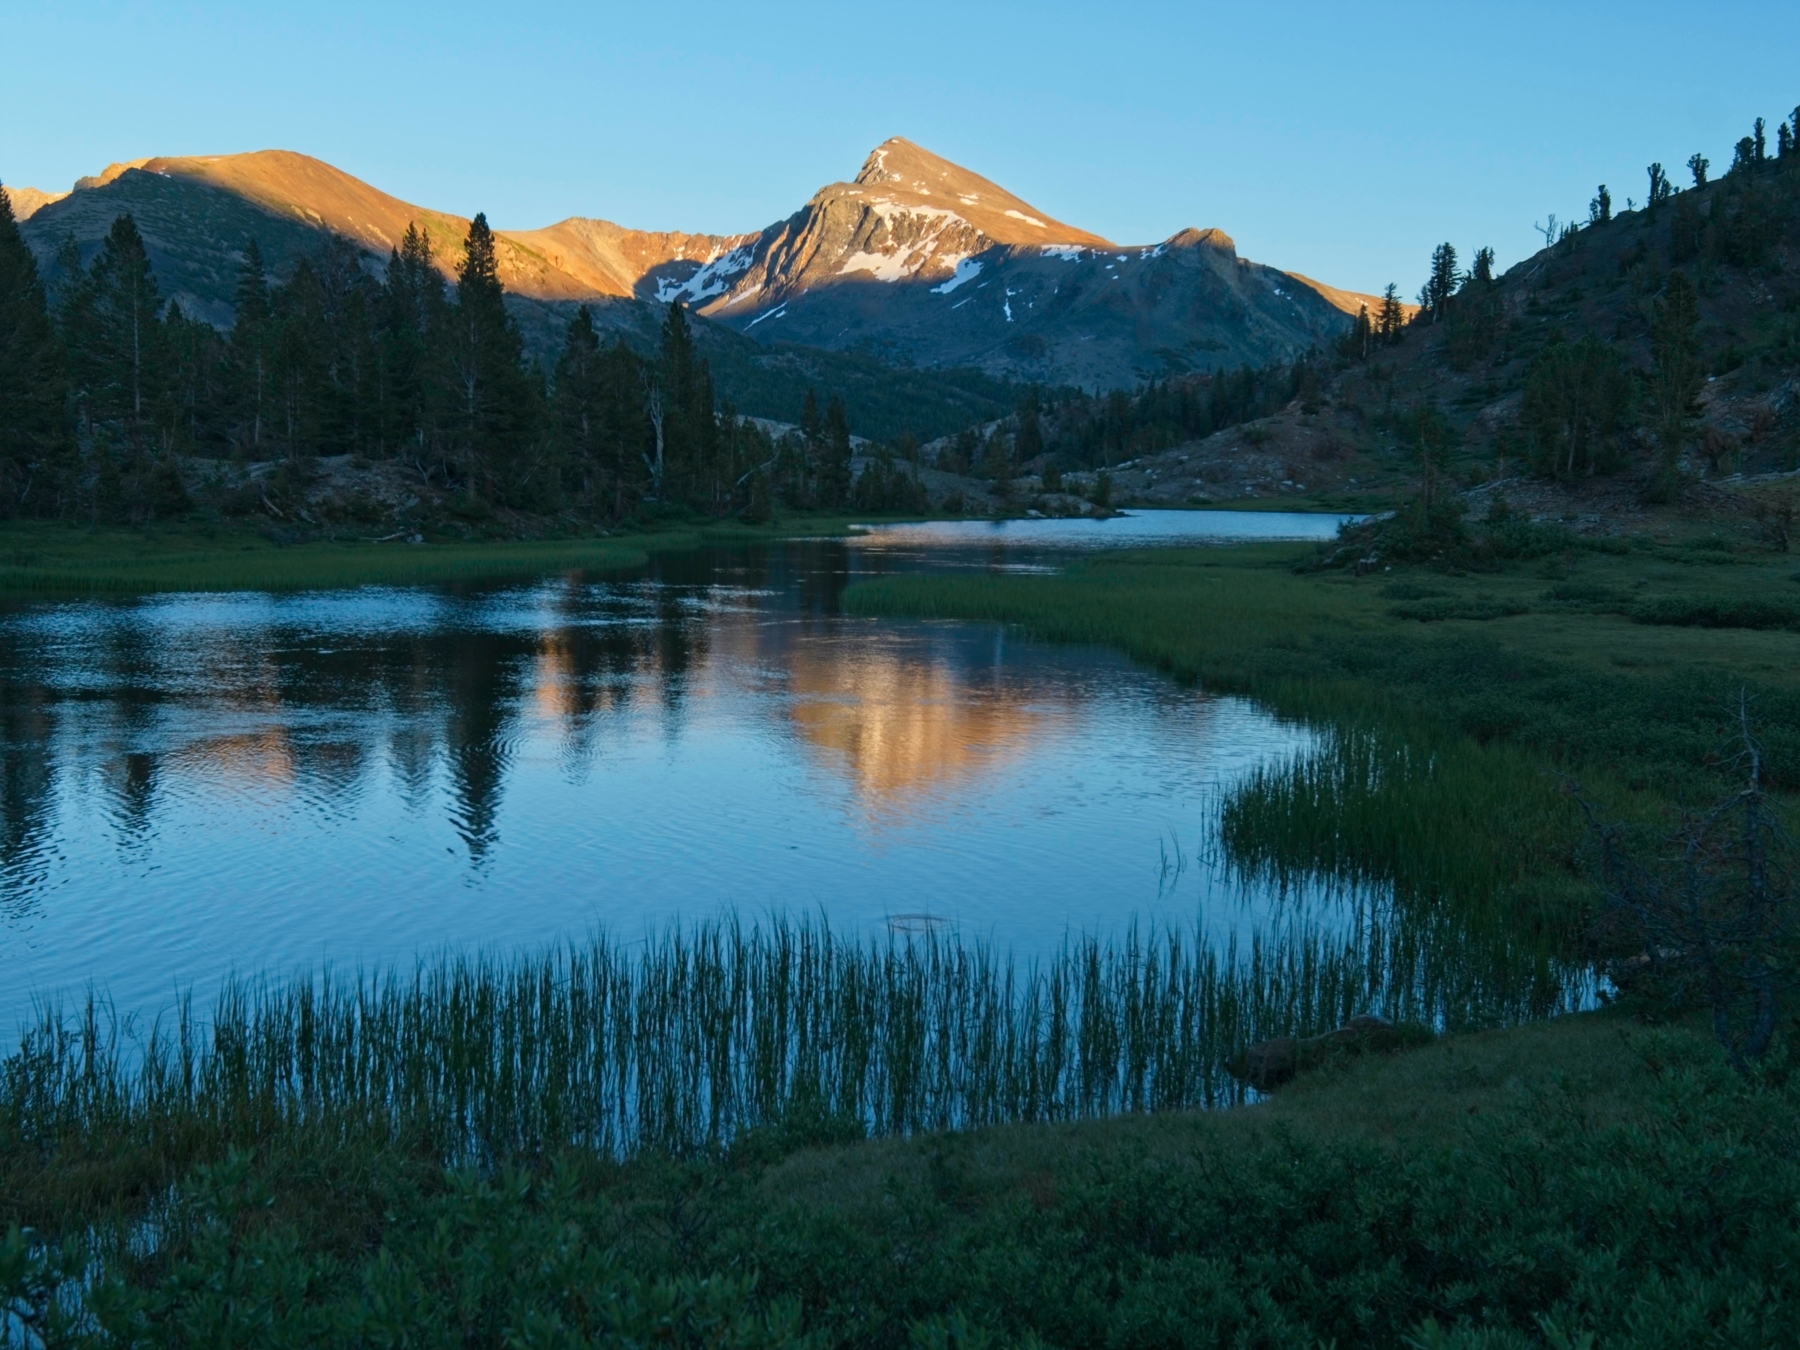
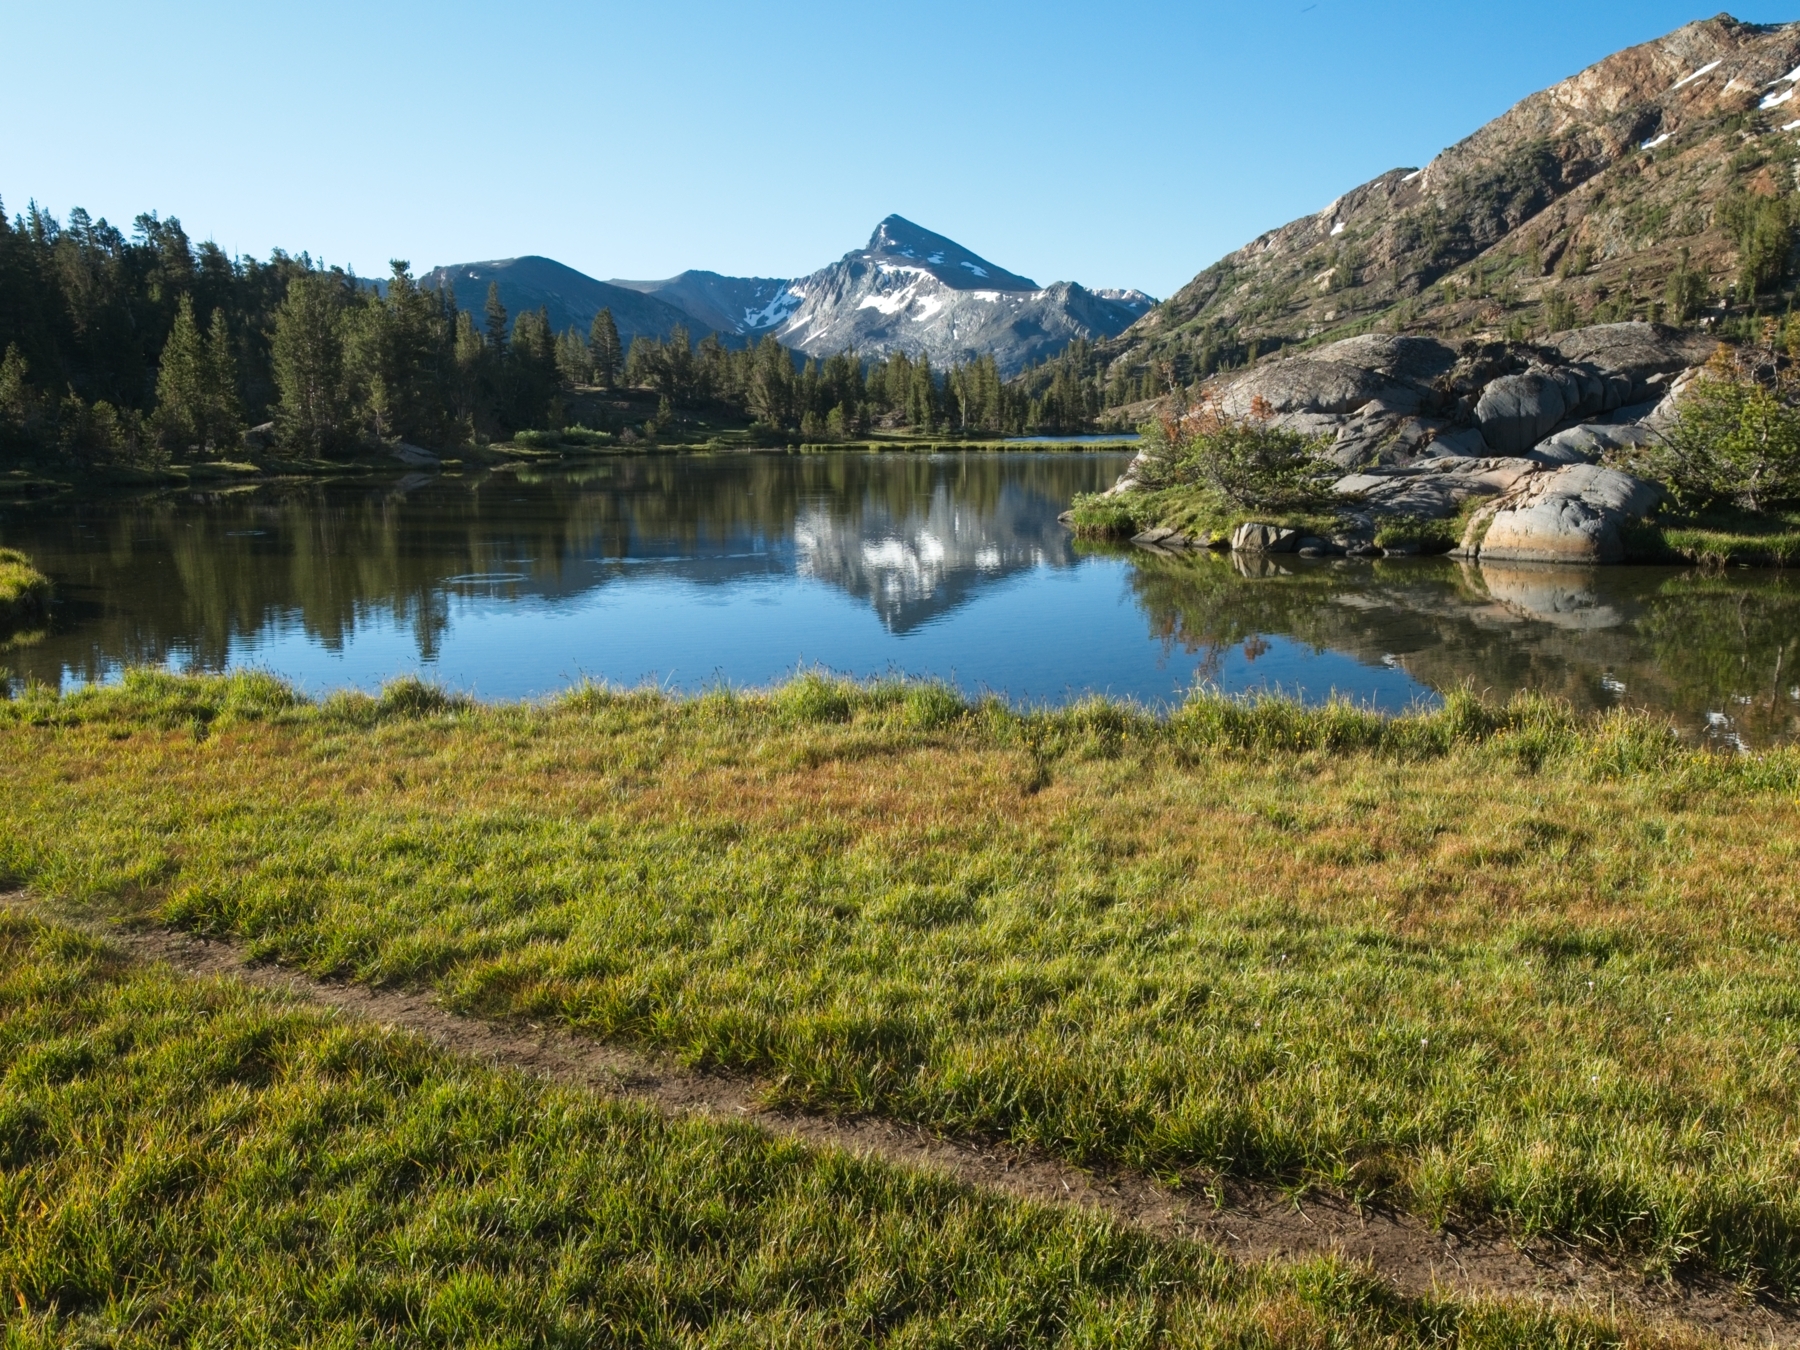
Later in the afternoon, after a much-needed lunch break beneath a sprawling pine tree, I emerge from the forest into a pristine alpine meadow. I follow a narrow, winding path that wanders through the grass and between scattered boulders to the banks of the lowest of the Gaylor Lakes. Due to its proximity to Tuolumne Meadows (and the road), camping is not allowed here, but it sure looks like a great place to hang out. I’m a little surprised to find the meadows and lakeshore completely vacant; it’s only taken me an hour or two to walk here from the road! While the meadow and the lake are pretty, the best view is the Cathedral Range to the south. There is still a ton of snow up there! I’ll be hiking just below those peaks in a few days.


The trail ends at Gaylor Lake, so I set off cross-country once again. It’s easy going here; just a gentle, grassy slope between me and the next landmark, the red-colored Gaylor Peak. I join a different trail between the upper Gaylor Lakes and follow it through more beautiful meadows to the head of the uppermost Gaylor Lake. A bunch of families are out hiking here (the nearby Gaylor Lakes trailhead provides easy access), and I pass a few on my way up the trail. Beyond the lake, the path climbs a steep hill to the ruins of the Great Sierra Mine, a long-abandoned site littered with old mineshafts and crumbling cabins.


I don’t stop for long in the ruins, opting instead to stroll slowly through. The network of use trails soon ends and I find myself in route-finding mode once again. Roper describes the next landmark, Mineshaft Pass, as “a small but distinct red and white melange of rock.” Even from a distance, the pass is fairly easy to identify, so I make my way over to it.
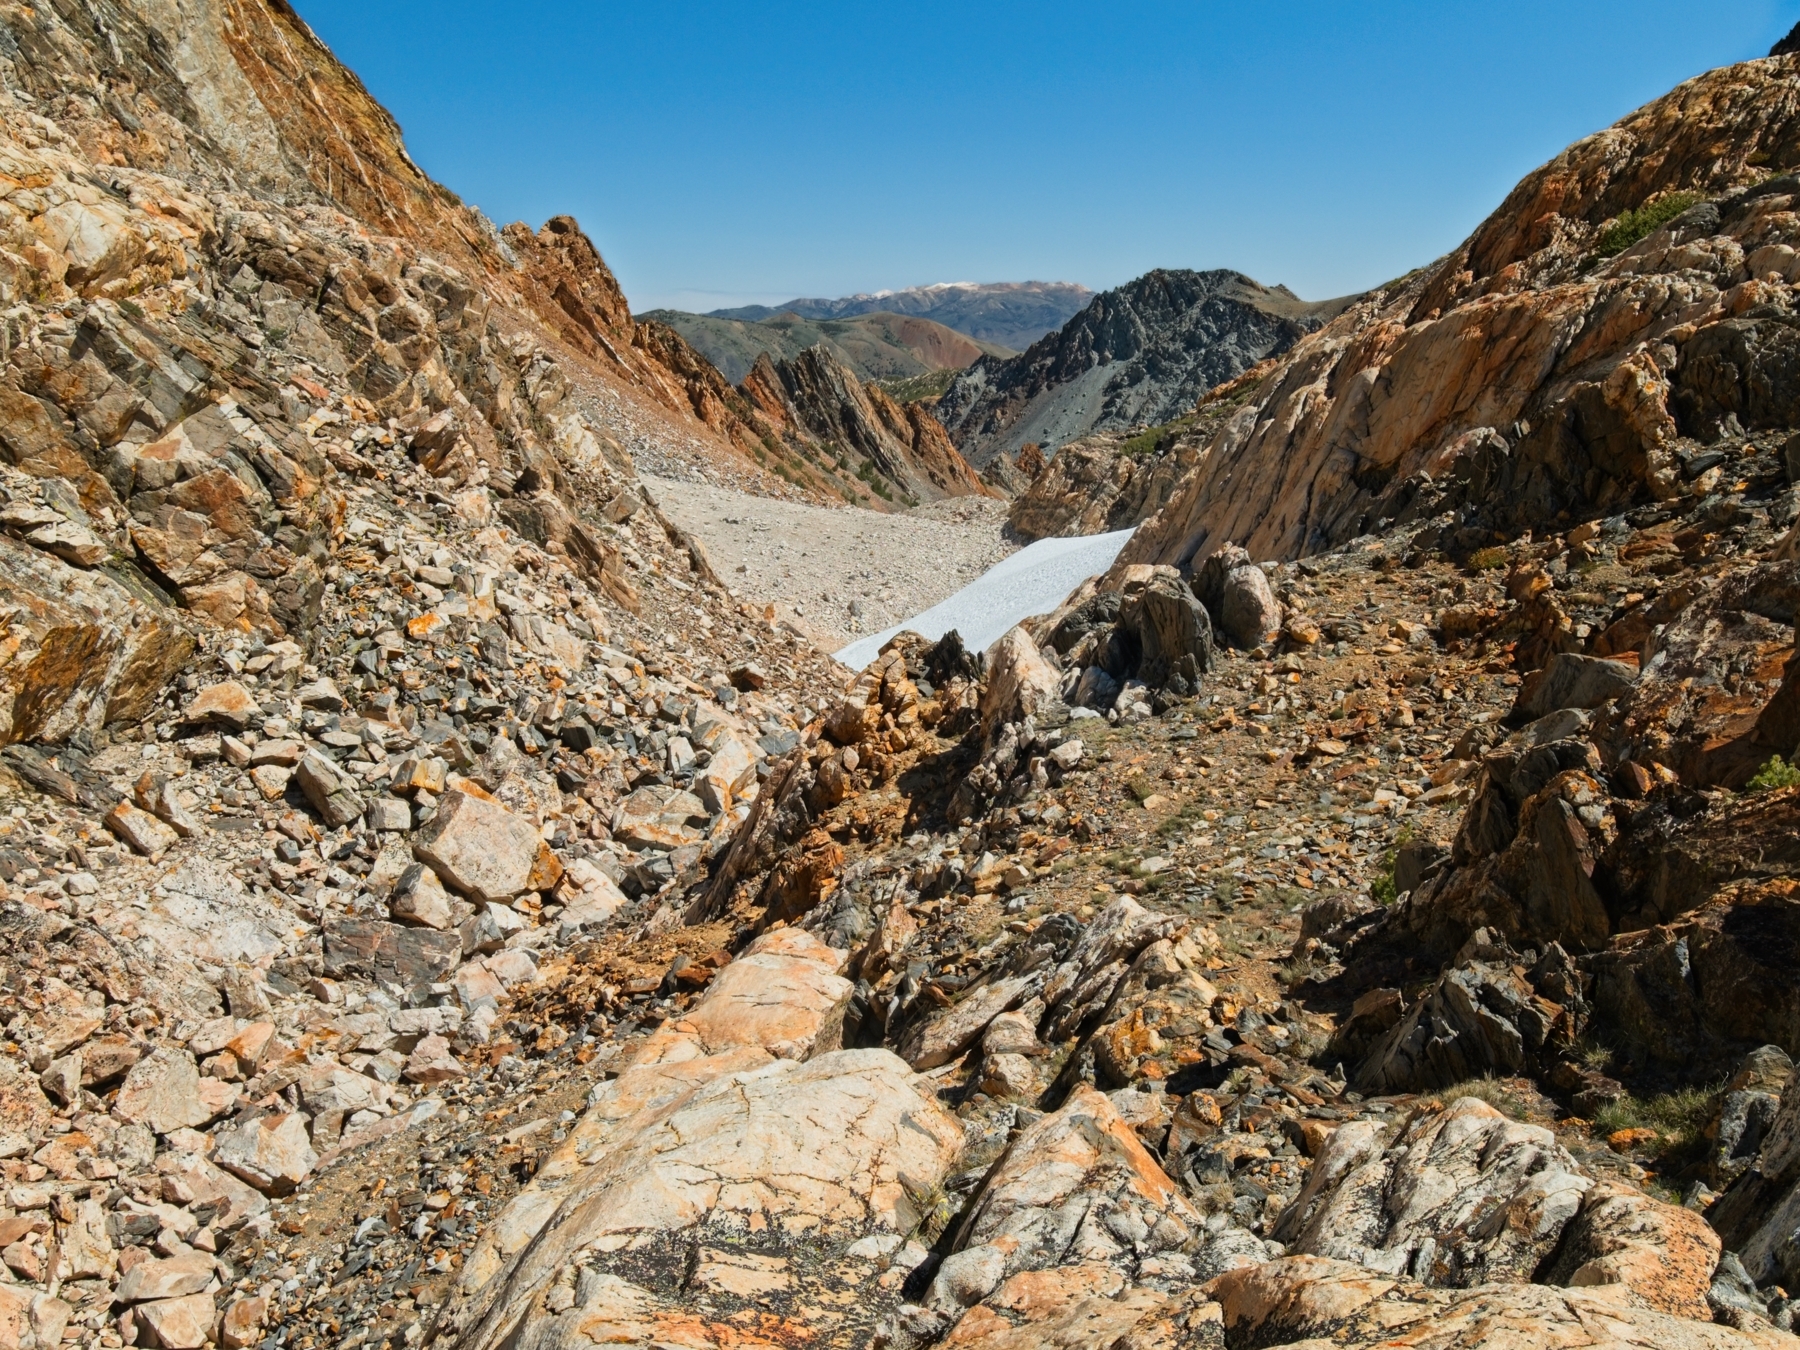
This section of the Sierra High Route passes through an interesting geological feature: a contact zone between silver granite and darker metamorphic rocks like slate. The transition between the two can be quite abrupt here, with granite transitioning to slate in only a few hundred feet. At the moment, I’m walking through slate and find the experience a little disconcerting. In contrast to granite, which is characterized by large, sloping slabs and rounded boulders, the slate occurs in shards with sharp edges everywhere! I’m careful to watch my step (and my ankles) as I pick my way across the mountainside.


The view from the top of Mineshaft Pass is beautiful but very different than many of the mountaintop vistas I’ve enjoyed so far. The peaks to the east of the Sierra crest are barren – hardly a tree in sight. The metamorphic rock is also much more colorful than the usual Sierra granite; everywhere I look there are shades of red and orange. Just below the pass is a collapsed mineshaft. I keep my distance; even “collapsed,” it’s still a pretty deep hole!

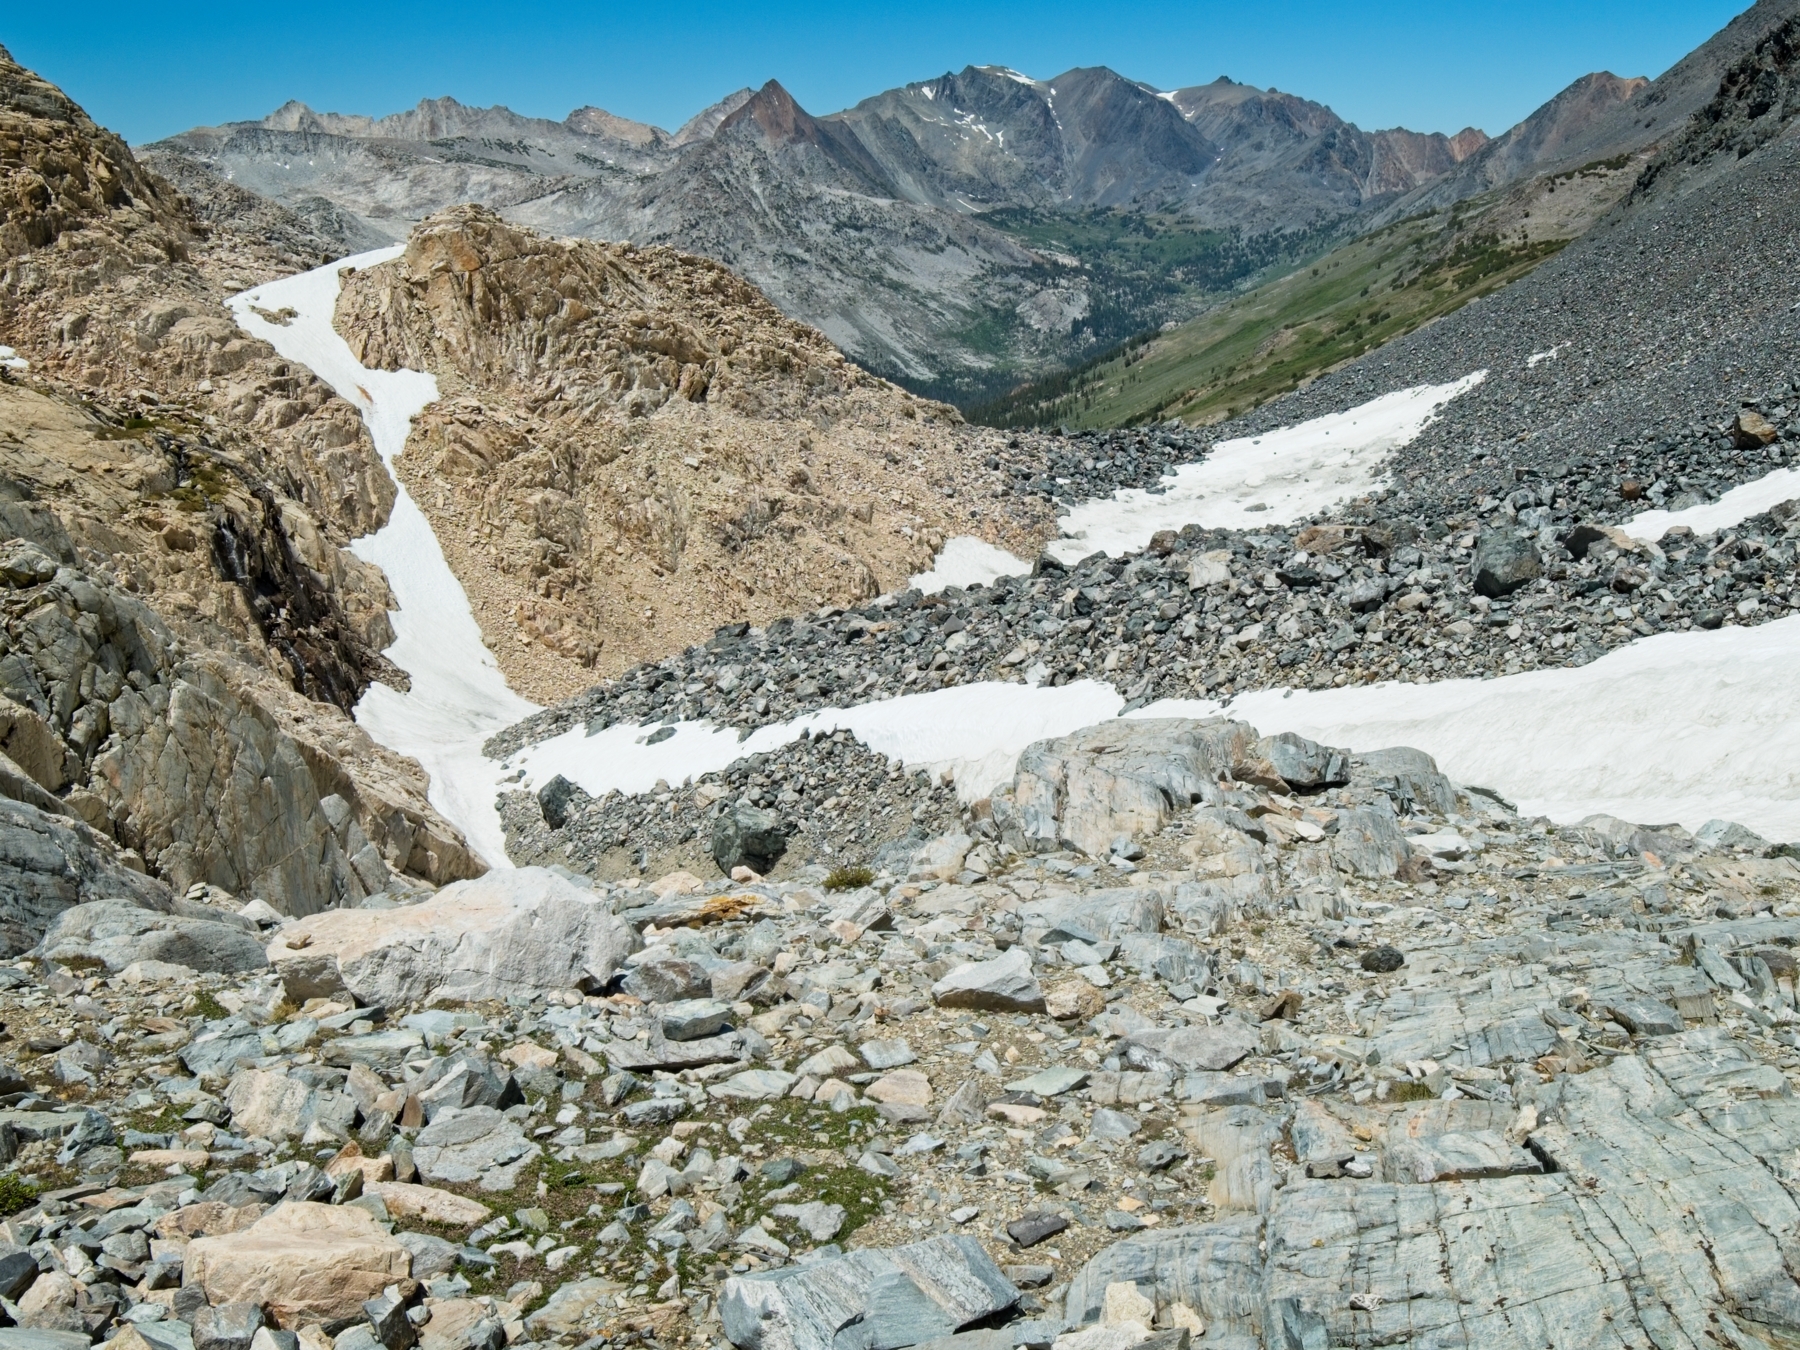
The hiking beyond Mineshaft Pass proves to be one of the more difficult route-finding sections of the Sierra High Route. Roper’s instructions are fairly clear: descend to below a red bench, then contour across a white, slabby section followed by darker metamorphic rock. The difficulty for me is in the qualitative words Roper uses to describe the duration of each section, e.g., “this section quickly leads to easier terrain.” Apparently my definition of “quickly” is a little different than Roper’s. I eventually make my way across the white, slabby section and the darker metamorphic rock, but not without plenty of second-guessing and uncertainty.


After contouring around the mountainside for far longer than anticipated, I reach a meadow and the “hidden valley” Roper describes, finally eliminating my uncertainty about the route. For those of you that are planning to hike this route, the valley lies near the three-pronged confluence of creeks below the large snowfield; these creeks flow into Fantail Lake in the valley below.
I enjoy an easy stroll through the meadow into the so-called hidden valley, which soon steepens dramatically as it drops toward the valley below. Following the guidebook, I begin contouring west toward Mount Conness. However, the next set of instructions from the guidebook puzzle me: “Soon one spots a portion of Spuller Lake… easy but roundabout terrain takes one down to the outlet.” I’ve been able to see Spuller Lake since leaving the valley; does that mean I should begin descending here? A glance at the slope below dissuades me from that plan: it is steep and loose! So I continue contouring for a while until I find a gentler path into the valley. Cross-country travel is a bit of a gamble; your first route choice may or may not work out. In this case, I begin several descents before finally finding a slope that provides safe passage.


By the time I reach the outlet creek below Spuller Lake, it’s 4:00. This portion of the Sierra High Route is in the Hall Research Natural Area, a no-camping zone. There are many miles and several steep climbs between me and the next legal camping area near Cascade Lake, so I do a little backtracking, following a well-worn path that descends along Mine Creek to Fantail Lake. Just beyond the lake, I pass a sign marking the nature area boundary and camping is once again permitted. It takes me a little while to find a spot away from the trail, water, and on soft ground (there is still a ton of sharp shale here!). I set up my tent and spend the rest of the evening relaxing.

I’m nervous about the next few days on the Sierra High Route. Several of the sections described in the guidebook sound like they are steep, exposed, and tricky to find routes through. I’m particularly nervous about Sky Pilot Col, supposedly the most rugged pass on the entire route. Considering the rough terrain at Frozen Lake Pass and Snow Tongue Pass, I’m not super pumped to find out what “most rugged” entails. But that’s a problem for another day (i.e., tomorrow), so I put it out of my mind for the evening and focus on enjoying the beautiful wilderness.
Shell Lake to Soldier Lake
6 July 2020 | 10.4 mi | +4800 / -4000 ft | View on Map
When I wake up in the morning I feel rested and ready to tackle the next section of the Sierra High Route! I eat some breakfast, pack up camp, and the retrace my steps back toward Spuller Lake. It’s an incredibly scenic walk, through the path gains a fair bit of altitude along the way!
The trail ends at Spuller Lake, but the terrain remains straightforward and I enjoy wandering through the small hills and valleys toward Mount Conness.


The next challenge is the tall, eastern ridge of Mount Conness. Roper describes this ascent as “easy,” but, as usual, the climb proves to be quite difficult. While it’s true that there is no technical terrain — it’s mostly grass and sloped rocks — the ridge is fairly steep! I take my time with plenty of pauses to catch my breath on the way up.
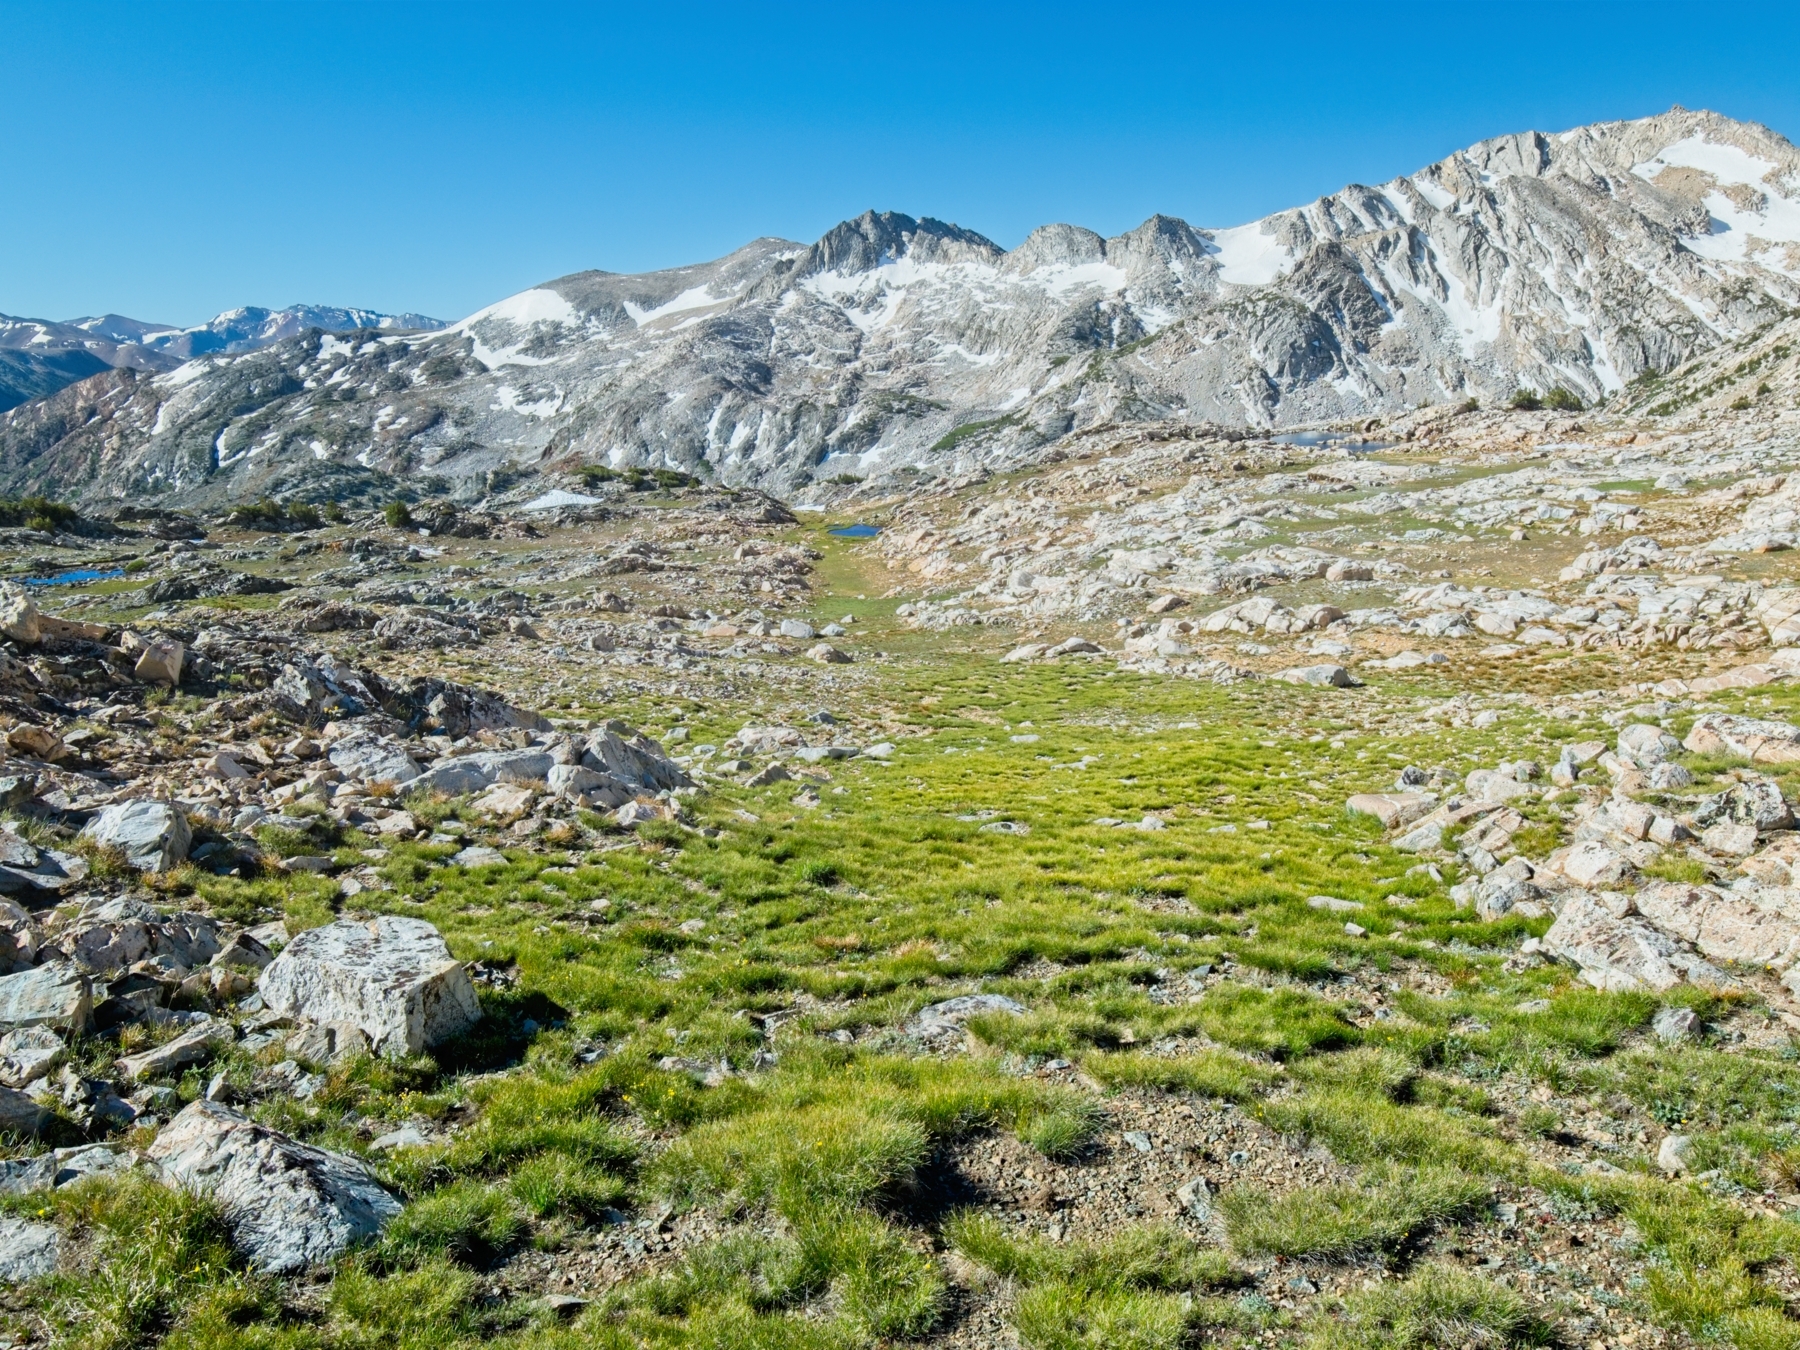
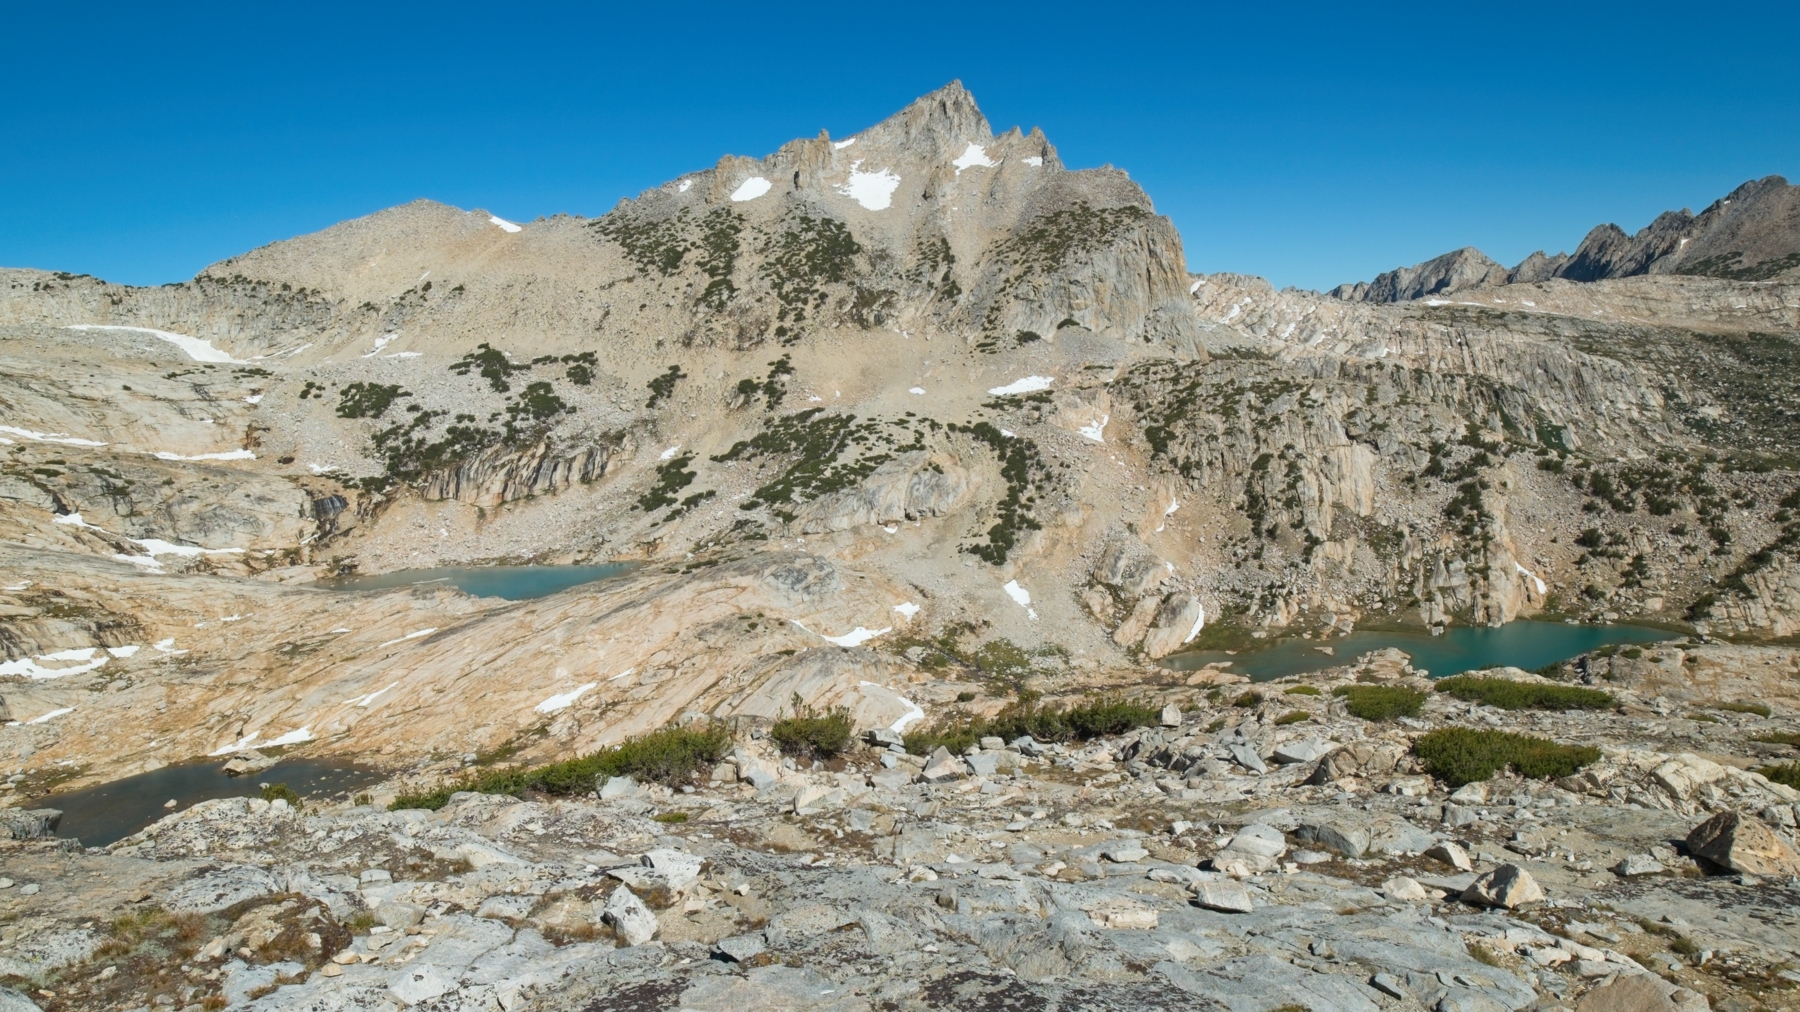
The top of the ridge turns out to be wide and flat with several small tarns dotted across the landscape. I wander over to the opposite side where a steep drop-off overlooks a glacially-carved valley. Long, parallel troughs across the valley contain small lakes and lines of trees, reminding me of the terrain below the Sperry Glacier in Glacier National Park.
After admiring the view for a few minutes, I pull the guidebook from my pack and read about the next section of the hike, a section I’ve been nervous about for days. Roper describes a route that first climbs a few hundred feet up the eastern ridge to a downward sloping “spur.” For some reason, his descriptions evoke images of steep rock and treacherous climbing in my mind… However, now that I’m here it doesn’t look all that bad. The eastern ridge isn’t really very steep and the spur looks doable!


Indeed, I have an easy time hiking up to the spur and an even easier time descending it toward the Conness Lakes. I’ve been nervous about it for days and it turns out to be pretty darn easy. For the most part, I’m able to speed down long granite ramps. I occasionally have to cross a snow-filled chute or navigate around a small drop off, but these obstacles are few and far between.
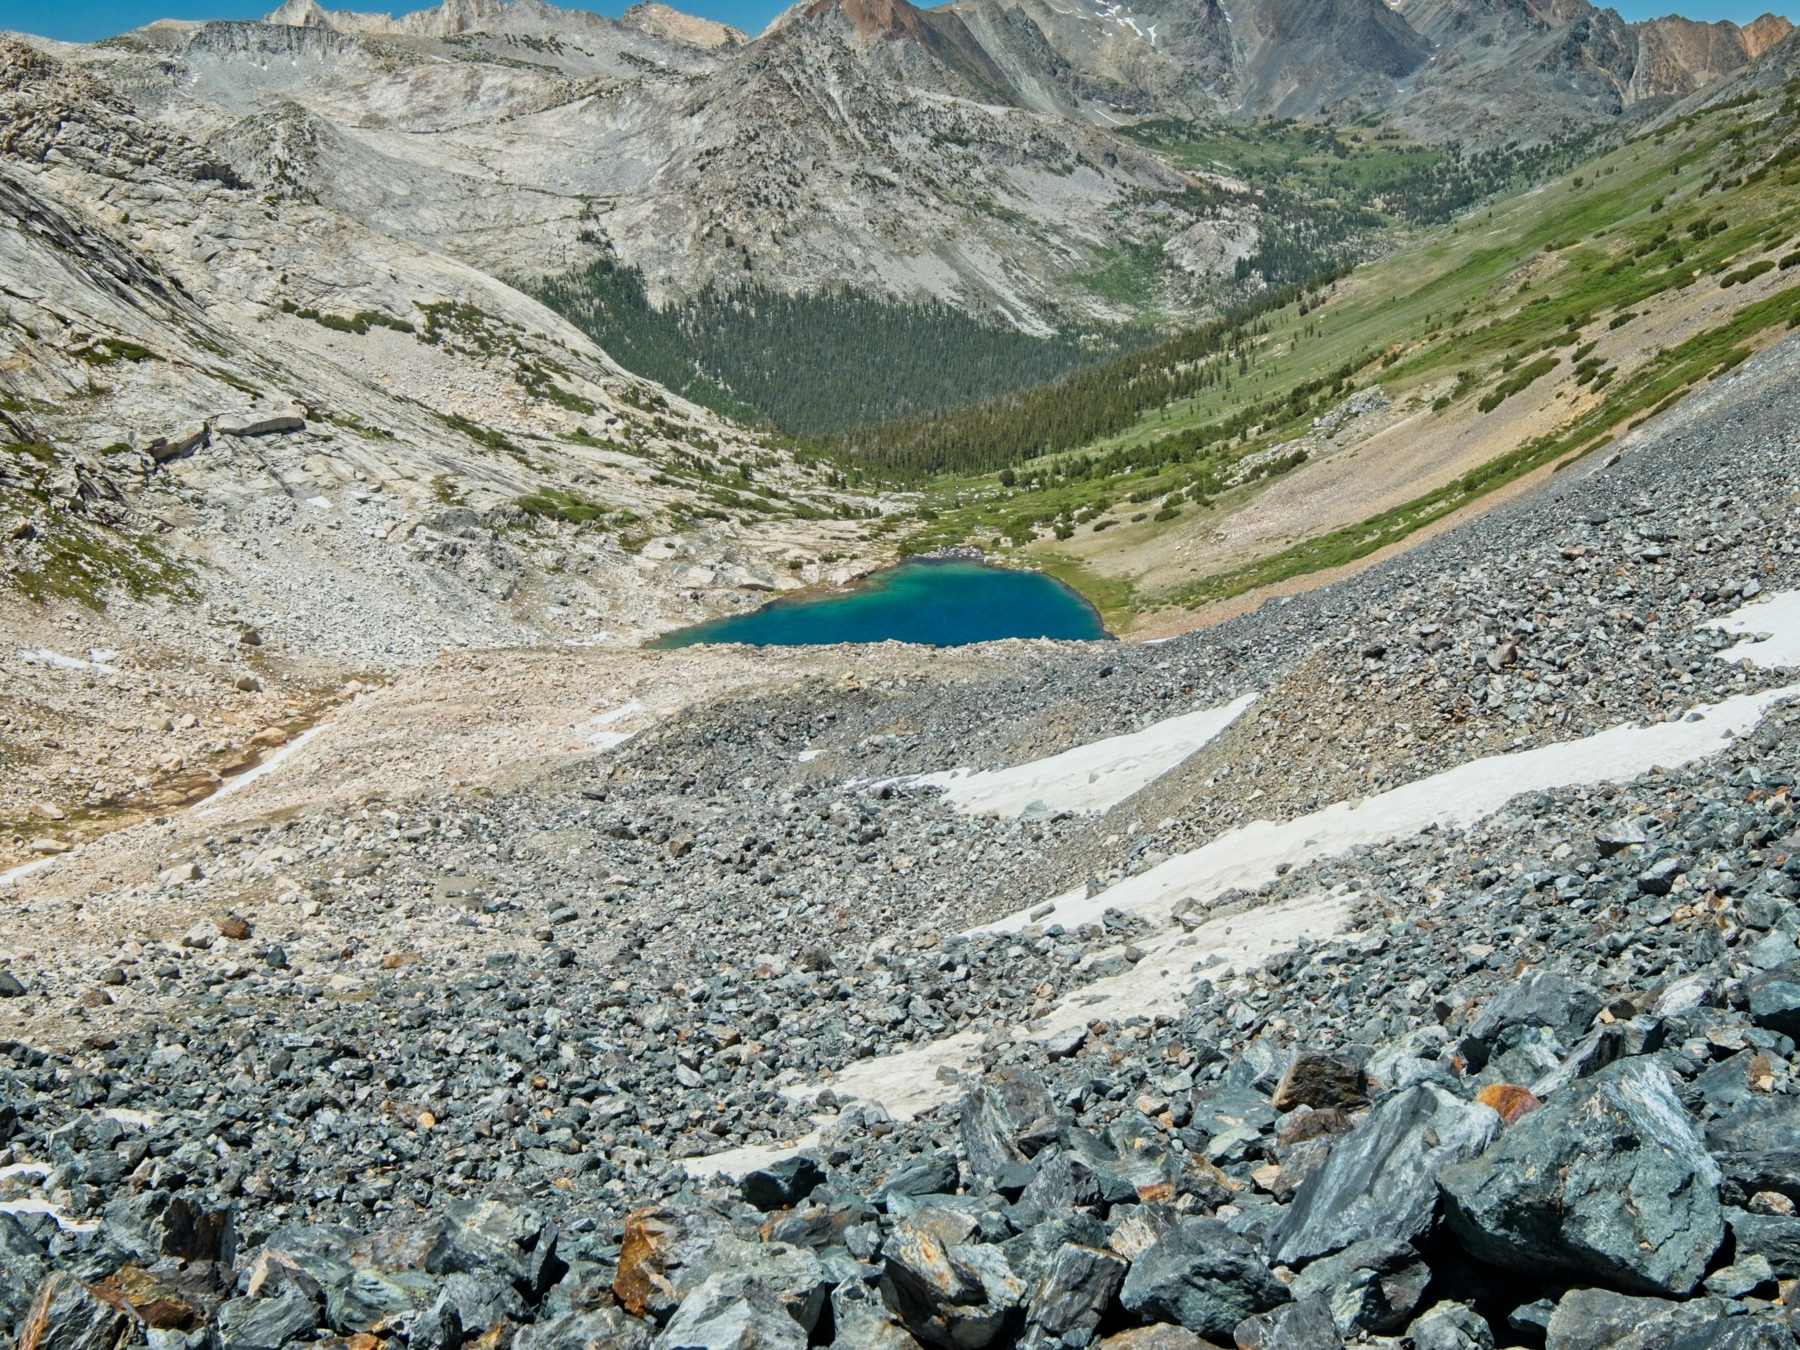
The spur tapers off near the northernmost Conness Lake; I cross the outlet creek just above a large waterfall and then climb the eastern ridge of North Peak, which thankfully is much shorter than the Conness east ridge. Descending from the ridge, I stride through a rock-strewn valley toward Cascade Lake. This is the first spot on the Sierra High Route since Tuolumne Meadows where camping is allowed; needless to say, I would not have made it here last night!

With lunchtime quickly approaching, my stomach is grumbling but I decide to push on for a few more minutes to reach Secret Lake. I mean, “I ate lunch at Secret Lake” just sounds awesome! I begin to regret the decision as I struggle up the steep slope on a little-traveled trail, but I eventually reach the small lake. There are no trees to be found, so I find a towering boulder to sit underneath while I enjoy peanut butter, dried fruit, and some pita bread.
Sky Pilot Col is clearly visible from the lake and the approach looks terrible. There’s plenty of steep talus and, if Roper is to believed, loose, steep, “offensive” scree just below the pass. I can’t bring myself to start the difficult climb just yet, so I rest for a while under the big rock.
As predicted, the climb to Sky Pilot Col is very offensive. Many of the rocks are loose, and I slip and slide on the way up to the bowl beneath the pass. I pick my way across the bowl, hopping from rock to rock, and then begin the final push to the pass. The higher I go, the looser the rocks are. Near the top I’m basically on all fours, carefully placing my hands and feet on solid-looking rocks to avoid sliding backwards. It’s not particularly dangerous — the slides are slow and not too steep — but it’s incredibly frustrating to be unable to make any progress upward. I finally reach the top and pause for a while to appreciate the views from this hard-fought ascent.


As I take in the views, I scope out the descent and am disheartened to see that it is even steeper and looser than the ascent! In my experience, there’s frequently an “easy” side and a hard “side” of a pass; Sky Pilot Col appears to be an exception with two “very hard” sides. Wandering across the saddle a bit, I try to find a path down that doesn’t involve sliding through dirt and gravel, but can’t find anything that I feel safer on. So… dirt and gravel it is! I squat as low as I can with my butt just above my heels and slide carefully down the slope. I soon reach a large, heavily-sun-cupped snowfield that continues descending at a steep angle. The snow forms a sort of bowl with a deep concavity full of bright teal water in the center. I’m sure there is plenty more water beneath the snow, so I stay away from the tiny pond as I step between sun cups. It’s incredibly hot on top of the snow, and I’m soon sweating even though it’s not a particularly difficult bit of hiking.
On the other side of the snow, I cross a small rocky spur and look for Shepherd Lake, the next major landmark on the Sierra High Route. To my great disappointment, there is no lake in sight, just endless talus. I sigh and begin picking my way down the slope, crossing a few small snowfields along the way. I pull out my microspikes a few times for extra safety while walking across the steepest snow; one such field drops precariously into a short gorge that I’m not eager to explore. Thankfully, the snow is relatively soft and the microspikes provide plenty of extra grip.
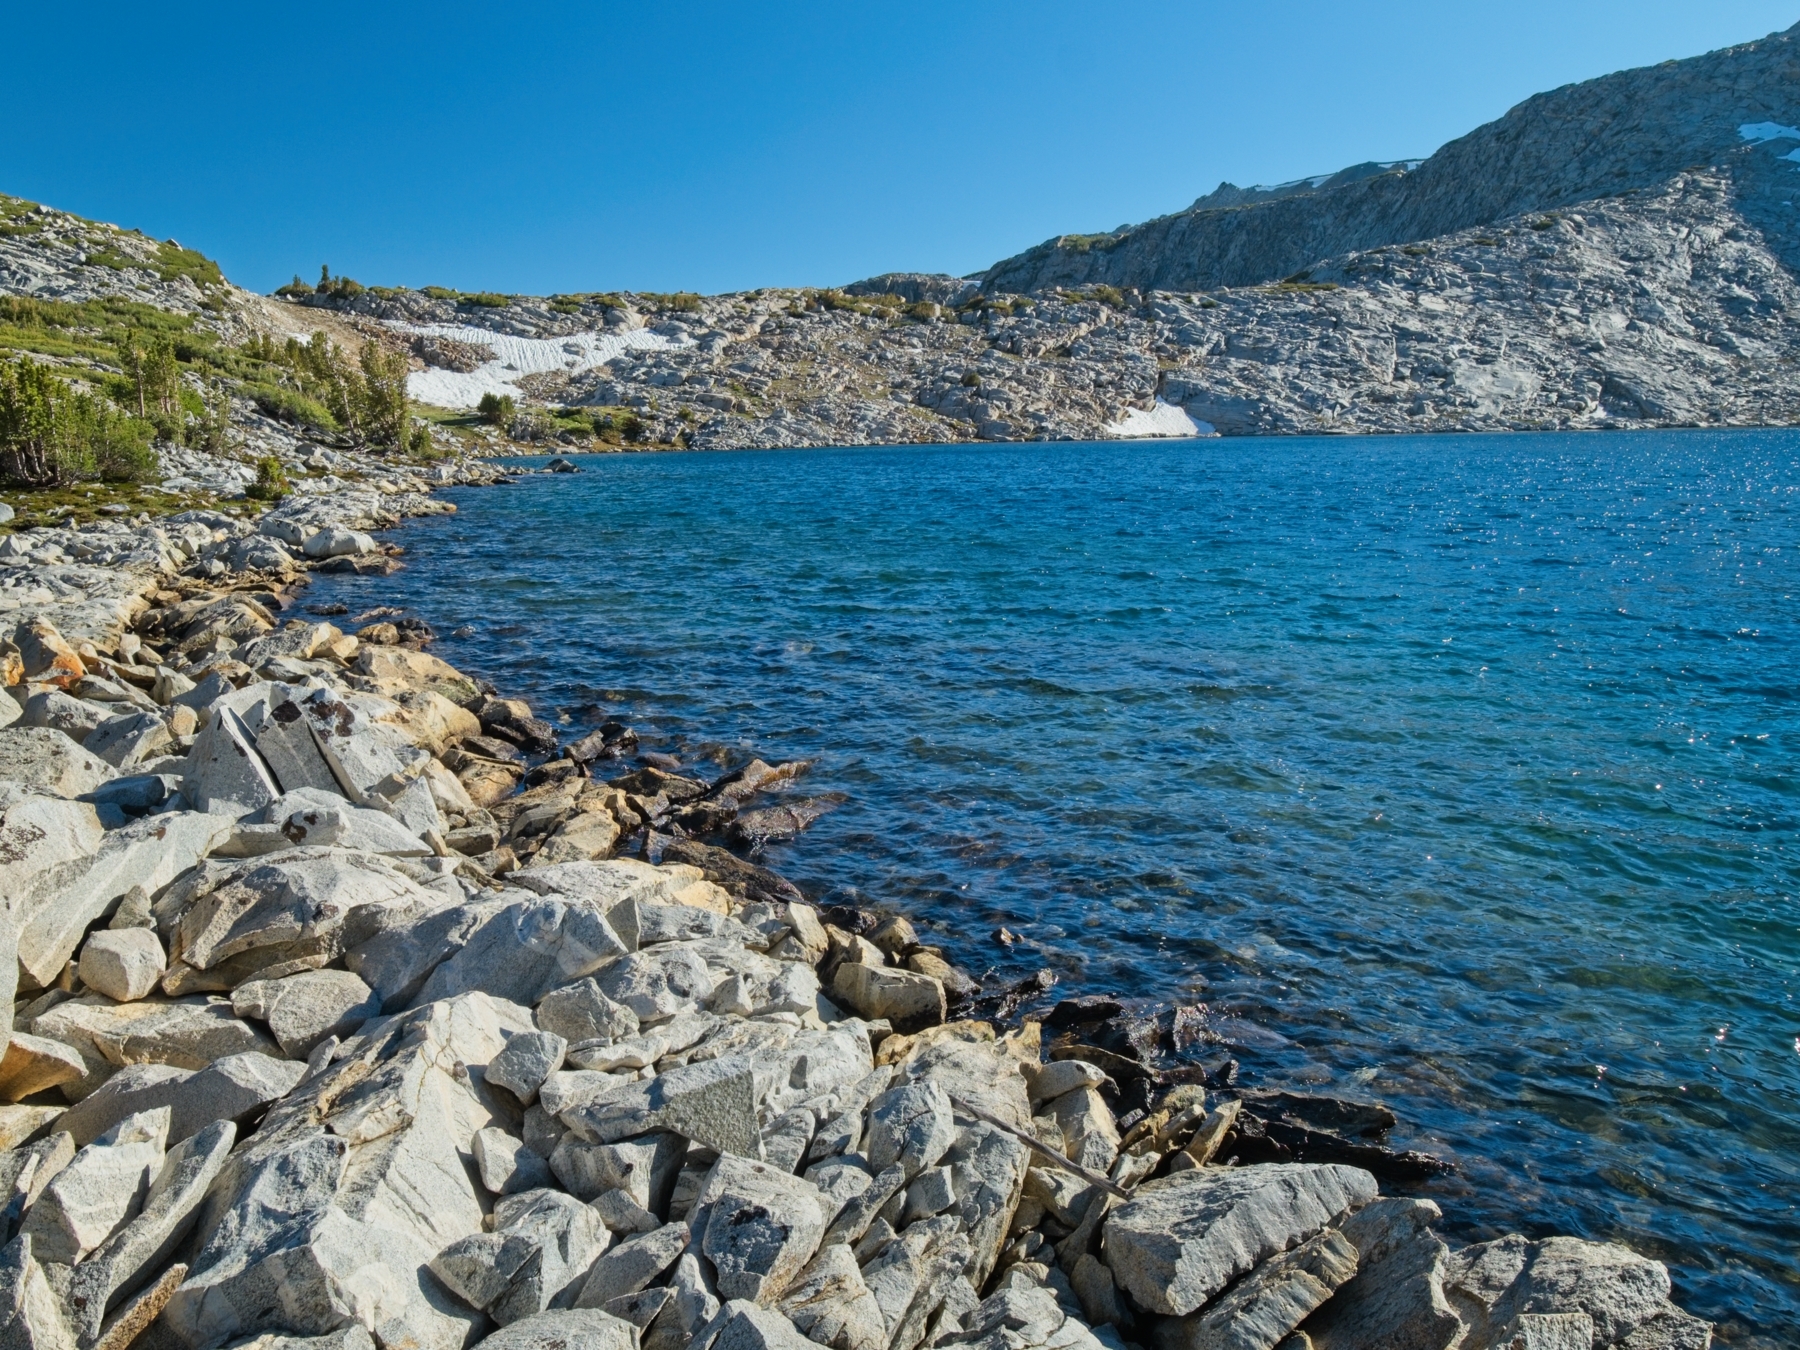
Further down the slope, I finally spot Shepherd Lake. It’s still a long way off, but at least the end is in sight! Crossing the metamorphic talus (slate, I think?) proves to be exhausting as many of the rocks shift beneath my feet. Plus, they’re much sharper than the granite I’m used to crossing! I notice a granite talus field on the left and descend toward it as quickly as possible. A few short glissades down small patches of snow and more rock hopping soon deliver me to the lighter, more solid rock.
Once on the granite, I’m able to move much more quickly. My pace increases even more when I reach a shallow creek flowing through the rock fields; the water and sediment have solidified the stones. Following the creek down to Shepherd Lake proves to be an excellent choice and I’m soon at the foot of the lake looking back at the Shepherd Crest and Sky Pilot Col. It’s official, Sky Pilot Col is the worst pass on the Sierra High Route.


I take a break near the outlet of Shepherd Lake for a few minutes to eat a snack, reapply sunscreen, and use the bathroom. It’s nice and cool, mostly due to the stiff wind blowing down the pass and over the water. Once I’ve rested up, I begin a relatively easy stroll down the valley toward Virginia Canyon. I stay a few hundred feet away from the Shepherd Lake outlet creek to avoid the thick willows, sticking instead to the rocky slopes above the creek. Following the guidebook, I eventually cross the creek and set off through an airy forest, making a beeline for Grey Butte.
Walking through the woods proves to be nice; the shade is pleasant and I spot a few deer along the way. A few bits are steep, and the grassy slopes are surprisingly slippery, resulting in a few falls directly onto my butt. Perhaps an hour or two later, I finally reach Return Creek at the bottom of the canyon and cross it. Shortly thereafter I step across the Virginia Canyon Trail and then the small creek that flows from Soldier Lake, my destination for the night.
The next few hours of hiking are absolutely no fun. I struggle up a steep hillside through dense brush and fallen trees, literally bushwhacking. I see a few more deer, some grouse, and then several fresh bear droppings. The only thing better than bushwhacking up a steep hill is bushwhacking up a steep hill wondering if you’re going to come face to face with a bear around the next corner. I make lots of noise and call out “Hey-oh!” every few minutes; if there are any bears in the area, they have plenty of time to get away from me.
After ascending about a thousand feet, I emerge from the trees and bushes into a landscape of solid granite slabs. My calves are already burning from the steep climb, so walking up the sloped slabs proves difficult. By the time I reach Soldier Lake, I’m exhausted and very much ready to be done for the day.

I thank my lucky stars that there are campsites scattered around the edge of this rock-bound lake and begin setting up the tent. It’s very windy, so I’m careful to secure the tent as I go. Once the tent is up, I find a sheltered spot behind some rocks and scrubby trees and cook dinner. The hot food cheers me up considerably!
After dinner, I spend some time looking at the map. As the title for this section of the hike (‘Canyon Country’) suggests, the route traverses some major glacially carved canyons; Virginia Canyon is the first, and I’ll reach Spiller Canyon tomorrow. I think if I were going to hike this section again I would modify the route a tad. Instead of bushwacking directly up the side of the canyon wall, I would follow the Virgina Canyon Trail up toward Virginia Pass and then hike cross-country to Return Lake and then up to Stanton Pass. This adds a few miles to the route, but would hopefully be more enjoyable and more scenic than struggling through the overgrown forest. From what I saw during the hiking today, I think it’s a viable alternative!
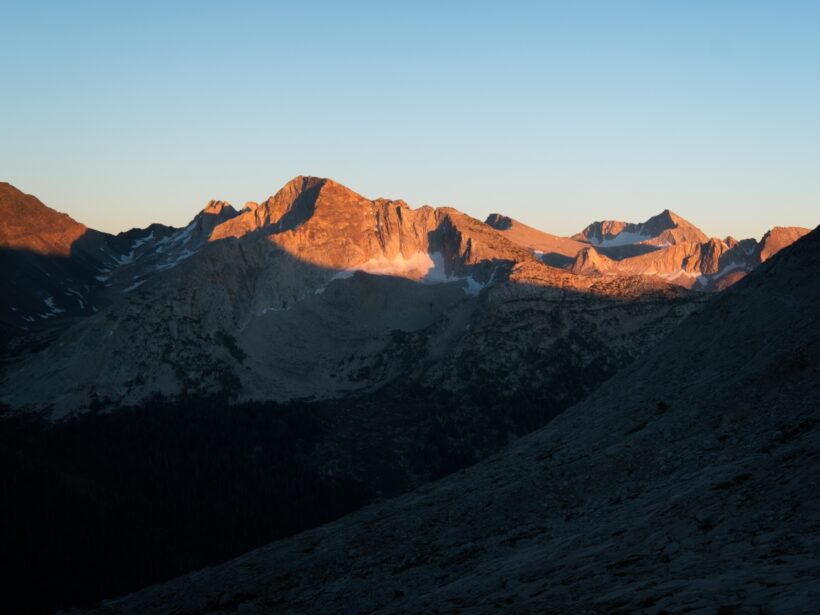
Later in the evening, I wash my face and feet in the lake, a habit I’ve grown fond of on this trip. It just feels good to be a little cleaner! I spend the rest of the evening relaxing in my sleeping bag, crawling out only once during sunset to snap a few photos and use the bathroom before going to sleep.
Soldier Lake to Horse Creek Pass
7 July, 2020 | 3.5 mi | +1500 / -1400 ft | View on Map
The next morning is crisp and cold and I really appreciate a hot bowl of oatmeal for breakfast. I’m excited to finish the Sierra High Route today! There are only a few more miles left to hike, and I’m hoping they’ll be relatively easy.
After packing up camp, I hike up to the saddle just west of Grey Butte and then descend easy slabs and grassy benches toward Virginia Peak, a prominent, red-colored mountain directly across the valley. I try not to descend too far, since I’ll be gaining all that elevation back to reach Stanton Pass. A few shallow, icy snow fields lie between myself and the pass, and I once again don microspikes to walk across them. The spikes are more of a convenience here than a safety measure; it’s much quicker to cross the snow when you’re not slipping and sliding.

As I walk toward the pass, I look out for what Roper describes as “a small notch seen near the highest whitebark pines on Stanton Peak’s ridge.” The trouble is, whitebark pines grow up and down the flanks of Stanton Peak… I wonder how long it’s been since that particular guideline has been updated? I make quick work of the approach to the pass on stable talus and a series of granite benches, but struggle a bit to climb the final 10 feet. A lot of the rock here is vertical and the small chutes that lead to the pass are choked with whitebark pines. I move across the ridge, eventually finding a spot where I can clamber up onto Stanton Pass.
I’m excited to see that the terrain before me does indeed look easy! There’s a bit of talus and some large slabs directly below the pass, then a wide, grassy valley that climbs gradually to Horse Creek Pass. I glance back to get one final look at Shepherd’s Crest and Mount Conness and then begin the descent.


Clambering down the slabs and talus proves to be relatively straightforward and I’m soon strolling through grassy meadows. With the end in sight, I begin cutting a long diagonal line down and across the sloping canyon walls. Most of the landscape here is covered in spongy turf with dozens of small creeks winding through the meadows toward the main creek below. There are plenty of willows, but for the most part they’re all short and easy to walk through.
Once I reach Spiller Creek, I enjoy a gentle climb to the top of the canyon. The final few hundred feet transition from grass to massive granite slabs, and then I’m at Horse Creek Pass! The end of my Sierra High Route adventure! Clearly, this pass isn’t actually the end of the route – under normal circumstances, I would hike down Horse Creek to Mono Village (about 5.5 miles and -3800′) and either hitchhike or take a bus back to Mammoth Lakes. However, with the pandemic this year I’m not eager to take a bus or hitchhike; instead, I’ve decided to hike back to where I began this hike: Mammoth Pass. So I take a few minutes to stare down the jumbled terrain before me and then turn around and begin the long walk back to Mammoth Pass.
This concludes the Canyon Country section of the Sierra High Route. Watch for another post soon detailing my hike back to Mammoth Pass on the PCT and JMT!
Mark Peters 23 May 2023
You’re experience and itinerary matches exactly with mine from 2013. Almost the same calendar days in July. We had horrific mosquitos, camped at the same spots you did(Soldier was cold and windy).
Regarding passes – I’ve only hiked the two northern sections of the SHR and a few other small pieces of southern sections. However, Sky Pilot Col was super hard but I thought Stanton was much more treacherous! I really don’t want to do either again but I’m determined to get back to Shepherd lake for a morning/evening photo excursion.
Mark Peters 23 May 2023
Really enjoyed your writeup and pictures and will check out the others too.